
Well maybe they don’t last a lifetime, but paper flowers do last a lot longer than real flowers, and with a spritz of scent they smell lovely too.

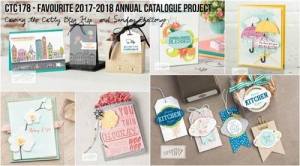
I have wanted to make a bunch of paper flower for ages, something to brighten up my desk. This week’s CASEing the Catty challenge was all about being inspired by your favourite project in the current catalogue. I decided today was the day to re-create the bunch of flowers shown on page 126.

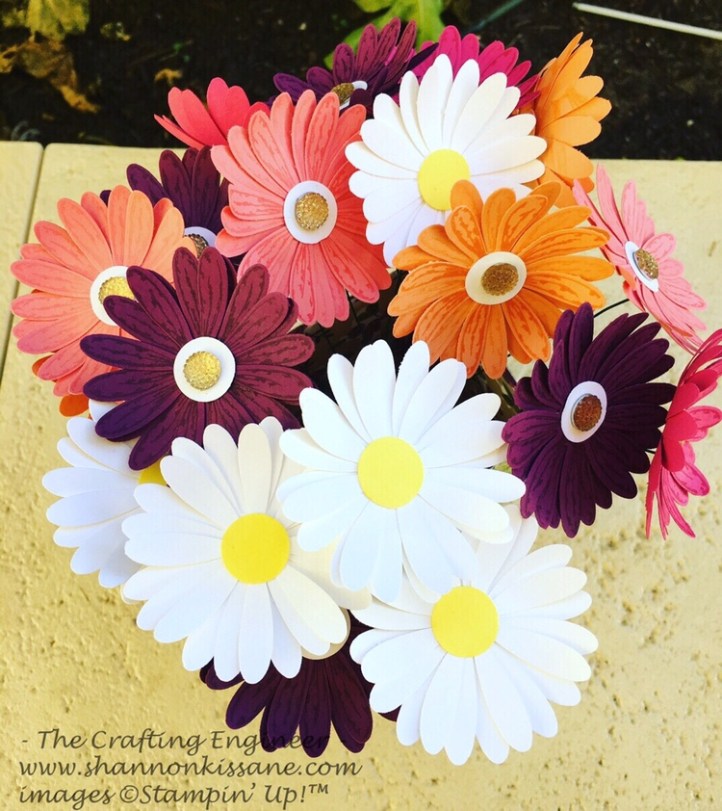
This bouquet was slightly more time consuming than running to the local florist and buying a bunch, but I enjoyed making them. Each flower is made up of 3 daisies punched out using the Dasiy Punch. This punch and the coordinating stamp set are carrying over into the 2018-2019 annual catalogue, however they will no longer be sold in the bundle package. The bundle allows you to buy both the punch and the stamp set and save 10% – this bundle pricing is only available until the end of this month (May), so if you think you would like it, but it fast!
On one piece of A4 card stock you can stamp and punch around 15 daisies, and if you use 3 daisies for each flower you construct, one piece of card stock will give you 5 flowers! The colours I used for my bouquet are as follows:
- Rich Razzleberry
- Grapefruit Grove
- Flirty Flamingo
- Melon Mambo &
- Thick Whisper White
You could literally use any colour you want, you will find all the card stock here, so take your pick. Save money buy buying the card stock in a multi-coloured pack. Just a note – grapefruit grove card stock will not be available until June 1st when the new catalogue launches, however it does come in the card stock packs that are available as a pre-launch special. All the details of this can be found here.
For each of your flowers you will also need a 1/2″ circle in the same colour card for the bottom of the flower, and an additional 1/2″ circle in white or yellow for the centre of the flowers. This circle is optional, you could just use the gem on it’s own, or even nothing at all.
Start by cutting each A4 sheet into 3 strips, each measuring 7cm wide. This will help keep your stamping even and make the punching easier. Using the daisy stamp, stamp the images in the same colour as the card stock. I used a mix of first and second generation stamping (second generation is where you don’t re-ink your stamp between making impressions). Then punch out all your daisies. 
I used liquid adhesive to glue 3 daisies together, each one slightly offset from the one under it to give some depth and volume to the flower, and then stuck the flower centre (1/2″ white / yellow card) to the centre. I turned the flowers over, and very gently used my bone folder to ever so slightly curve the petals upwards. For some of the flowers I added a large Gold Faceted Gem to the centre, others I left as is.

The flower stalks are 9″ long and are gauge 22. I bought them from E-bay and got a pack of 100 for around $5. 12″ ones would probably give you a bit more flexibility when it comes to vase selection, but I was making a paper vase so it didn’t matter so much for me.
When it came to attaching the stalks I used two different techniques. The first was a bit slower as it involved curling the punched daisies individually, then poking a hole in the bottom 1/2″ circle and bottom flower. I then pushed the wire through, bending it over slightly and secured it all with liquid glue, before then adding the top two flowers. After doing a couple this way, I then remembered watching a you tube where someone added tear and tape (double sided adhesive) to some card stock and then punched out the 1/2″ circles. After removing the backing on the tear and tape the flower wire was then just stuck to the bottom flower using this sticky circle.
To be honest the tear and tape method is probably a little less solid than poking the wire through and using liquid glue, but it didn’t make a huge difference and it was much quicker to be able to assemble the flowers and curl the petals all together. There are many ways to secure these wires, each to their own. My flowers will sit in a vase and not get touched so I wasn’t too worried.

For the white flowers, I didn’t stamp at all, just punched. I was going to stamp them in clear versa mark ink, but my versa mark ink pad was a little pink so I just left them 🙂
For the vase, instead of using a glass jar or a vase I had at home, I decided to make a paper one. I used a sheet of DSP from the Share What You Love DSP pack. This is a speciality DSP so is quite thick and sturdy. Essentially I made an open top box. You will need a piece that is 30cm wide. The height will depend on how tall you want your vase. I wanted mine to be 15cm tall when complete which meant allowing for 5cm at the bottom to form the base I need a piece that was 20cm long – so 30cm x 20cm. On the 30cm side, score at 7cm, 14cm, 21cm and 28cm. On the 20cm side score at 5cms. Fold and burnish all your score lines, and then snip off the small rectangle at the bottom of the 2cm panel, and mitre both ends of this flap for easy construction. Snip up all of the vertical score lines from the bottom to your 5cm score line. In the (rough) template below, scoring is shown with dashed lines, cutting in red. Add adhesive to the 2cm panel as well as the bottom flaps and join everything together.
All that is left is to arrange your flowers and (if you want) give them a spritz with your favourite scent.

Hope you have enjoyed these, and if you want to give them a go remember the bundle is only available until the end of May. Any questions – give me a shout.

