
There are a few different ways to combine colours when stamping images. Here are a few of my favourites.
Using Die Based Ink Marker Pens
In this technique you are basically colouring in, however you are colouring in the rubber of the stamp. This allows for precision when combining colours on intricate stamps. You can also colour in the stamp and then spritz it with some water prior to stamping and wa-la, you have something that loosely resembles water colouring
Masking using sticky notes or something else of the kind
For me, this technique works the best with photopolymer stamps. It involves placing a sticky note over one section of the stamp prior to inking up, which results with ink on transferring to the non-covered part of the stamp. Don’t forget to remove the sticky note prior to stamping! You would then need to mask the part of the stamp that you have just stamped, and use your second colour and re-stamp, making sure to align the images. This is why I think it works best with photopolymer stamps (unless you are using a stamping tool like the misti or something like it).
To better understand this method think about the flower stamp in the card below. It is one stamp, but I want the stems green and the flowers pink. I would put a sticky note over the flowers and ink up the stamp on the green ink pad and then stamp the image. I would then mask off the stems and ink up the stamp on the pink ink pad and stamp a second time, making sure I line up the flowers with the stems.
I didn’t actually use this technique in the card shown, as my stamp set was wood mounted – and lining it up to stamp twice would have been way past my ability!
Using Sponge Daubers to Apply Colour
This is the technique I actually used, and it was very easy and worked very well, especially since the stamp was a reasonably simple one. A sponge dauber is a little sponge mounted on a small cylindrical piece of plastic, which conveniently fits on your finger. I still used some scrap paper to mask off the section i wasn’t inking up, but using the dauber meant I could take my time and be a bit more precise. It also meant I could apply both the colours and just stamp once.
Basically I used my sponge dauber to apply the green to the stems, and then another dauber to apply the pink colour to the flowers. Then I stamped and the image came out perfectly.
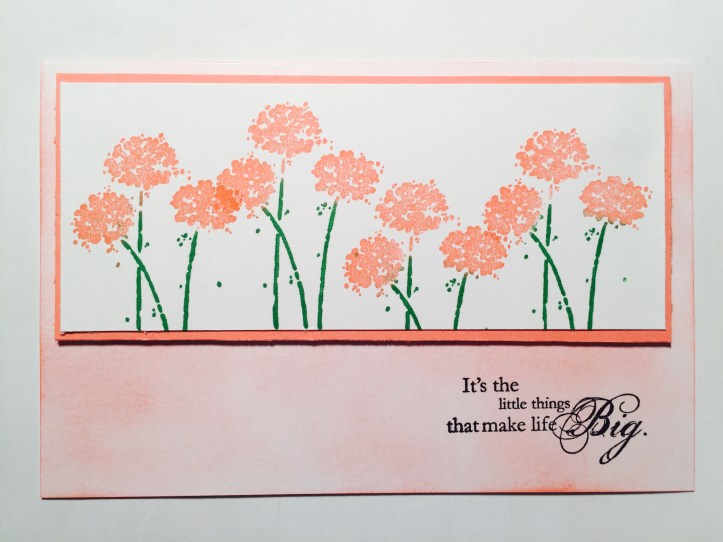
Details for the card shown are as follows:
- Stems stamped in cucumber crush
- Flowers stamped in flirty flamingo
- Flower and sentiment stamp are both from a Stampin Up set called Happy Harmony (retired)
- Base card is white card stock, sponged in flirty flaming
- Mat card stock is flirty flamingo

