

I love using my sponges to create scenes and backgrounds for cards. More often than not for the cards I make, the scene is the feature. Tonight however, I am featuring a reflective rhino.

This card uses mirror stamping, or reflection stamping – whatever you want to call it. Basically it involves stamping a mirror image of an image. It’s a useful technique if you have a directional stamp that is facing the opposite way of what you need – for instance an animal looking to the left when you would rather it look to the right.
The stamp set I have used is Animal Outings, a set I have used many times already, and will continue to use as it is very cute and very versatile. The card uses only four colours as this week I am playing along with the Just Add Ink design challenge – challenge #413.
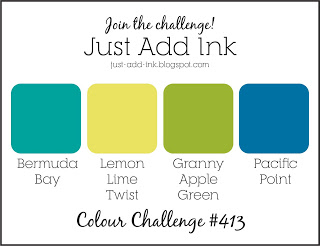
Unfortunately I have not done a big order yet for the new catalogue so I don’t have Granny Apple Green yet, however the idea is to pick colours as close as possible – so I substituted Old Olive for Granny Apple Green. The other three colours were use as suggested.
I stamped the top Rhino, coloured it with blends and then masked it off so I could sponge the sky. Prior to stamping the reflection I also sponged a bit of Bermuda Bay for the water.

To achieve the reflection, I used a similar technique to what Maria Kandylas does in this blog post. The stamp I used for the reflection is the large water colour wash in the Love What You Do stamp set – it is quite large and easily covered the rhino. One thing I should mention here is this – I used Archival grey ink to stamp my reflection, so now my stamp (or at least the back of my stamp) has a permanent Rhino image. It won’t affect my stamp at all because its on the non-stamping side. But it looks a bit odd – so don’t use an archival ink!

Moving on from my Oops! I coloured the reflected image using just my light coloured smokey slate blend and then filled in a bit more sponged water and sky. I finished by adding some streaks of white using a gel pen in the water area.
The sentiment comes from the Detailed Love stamp set, simple greeting, not huge in size but with a pretty font – perfect for the card. Both bits of background DSP (as well as the ribbon) are retired. The larger piece of DSP came from the Bubbles and Fizz DSP pack that came a freebie during Sale-A-Bration, as did the Bermuda Bay ribbon. The smaller piece of DSP came from the Tutti Frutti DSP stack in the recent Occasions catalogue.
Hope you like this one, come back tomorrow for a very special card I have created 🙂

Product List


Beautiful card, I must have a try with the technique, looks so cool.
LikeLiked by 1 person
Thank you 😊
LikeLike
This is gorgeous, Shannon! Your technique has created such a fabulous mirrored image and I love how your sponged background echoes the panels in your DSP layer.
LikeLiked by 1 person
Thank you Jan 🙂
LikeLike
This is fabulous Shannon! Creating this scene was a clever way to use the colours and you did a seamless job with all the stamping, sponging and colouring! Thanks for joining us at Just Add Ink this week.
LikeLiked by 1 person
Thanks Kim, I appreciate the kind words 🙂
LikeLike